

Gooart Space

My Training

Gooart Space · My Training

Train Anywhere.
AI Vision Corrects Your Form.

Gooart Space is an online-first combat fitness brand built around the 200+ Functional Combat System (FCS). Acting as your personal ai fitness coach, My Training is the ultimate web-based ai fitness app for training at home. Access our guided free exercise library to learn proper workout form, and let the ai vision form check correct your movements in real-time through your camera — no signup required.

Movement Database

Browse 150+ guided exercises from the 200+ FCS — filter by system, muscle, equipment, level and portability. Instantly launch the AI Vision form check on compatible drills.

AI Vision — Train Your Way
Phone

Easiest — open in your browser, use the rear camera, stand 2–3 m back.

PC / Laptop

Built-in or USB webcam — or turn your phone into a wireless camera via Phone Link.

Smart TV

Mirror or HDMI to the big screen and watch your live stats while you train.

USB Camera

Plug & play — switch cameras anytime with the in-app camera selector.

Shadowboxing Workout
AIBeginnerPhase 1.1: Strength & ConditioningFull Body/IntegratedBodyweight
Shadow Kickboxing
AIBeginnerPhase 1.1: Strength & ConditioningFull Body/IntegratedBodyweight
Ickey Shuffle
AIBeginnerPhase 1.1: Strength & ConditioningLateral CoreAgility Ladder
Double Unders
AIBeginnerPhase 1.1: Strength & ConditioningLateral CoreBodyweight
Ankle Pogo Jumps
AIBeginnerPhase 1.1: Strength & ConditioningLateral CoreBodyweight
Jump Rope for Boxing
AIBeginnerPhase 1.1: Strength & ConditioningFull Body/IntegratedSkipping Rope
World's Greatest Stretch
AIBeginnerPhase 1.1: Strength & ConditioningFull Body/IntegratedYoga/Exercise Mat
Cossack Squats
AIBeginnerPhase 1.1: Strength & ConditioningLower StabilizerBodyweight
Hindu Push-Up (Judo Push-Up)
AIBeginnerPhase 1.1: Strength & ConditioningAnterior CoreBodyweight
90/90 Hip Switches
AIBeginnerPhase 1.1: Strength & ConditioningLower StabilizerBodyweight
Kettlebell Halo
AIBeginnerPhase 1.1: Strength & ConditioningRotational CoreKettlebell
Single Leg Stand
AIBeginnerPhase 1.1: Strength & ConditioningAnterior CoreBodyweight
Dead Bug
AIBeginnerPhase 1.1: Strength & ConditioningAnterior CoreBodyweight
Slip & Roll
AIBeginnerPhase 1.1: Strength & ConditioningAnterior CoreBodyweight
Beast Hold to Alternating Reach
AIBeginnerPhase 1.1: Strength & ConditioningAnterior CoreBodyweight
Medicine Ball Slam
AIAdvancedPhase 1.1: Strength & ConditioningAnterior CoreMedicine Ball
Suspension Inverted Row
AIIntermediatePhase 1.1: Strength & ConditioningPosterior ChainPull-Up Bar / Gymnastic Rings
Kettlebell Swing
AIIntermediatePhase 1.1: Strength & ConditioningAnterior CoreKettlebell
Dumbbell Bulgarian Split Squat
AIIntermediatePhase 1.1: Strength & ConditioningLateral CoreDumbbell
Kettlebell Goblet Squats
AIIntermediatePhase 1.1: Strength & ConditioningAnterior CoreKettlebell
Bear Crawl
AIIntermediatePhase 1.1: Strength & ConditioningAnterior CoreYoga/Exercise Mat
Farmer's Carry
BeginnerPhase 1.1: Strength & ConditioningFull Body/IntegratedDumbbell
Plank
AIIntermediatePhase 1.1: Strength & ConditioningAnterior CoreYoga/Exercise Mat
Wall Sit
AIIntermediatePhase 1.1: Strength & ConditioningLateral CoreWall
Prone Y-T-W-L Raises
AIBeginnerPhase 1.1: Strength & ConditioningUpper PullYoga/Exercise Mat
Couch Stretch
AIBeginnerPhase 1.1: Strength & ConditioningAnterior CoreWall
PNF Banded Hamstring Stretch
AIBeginnerPhase 1.1: Strength & ConditioningLower StabilizerResistance Band
Dead Hang
AIBeginnerPhase 1.1: Strength & ConditioningGrip & NeckPull-Up Bar / Gymnastic Rings
Combat Stance (Bi-Jong)
AIBeginnerPhase 1.2: Footwork & MovementAnterior CoreBodyweight
Step & Slide
AIBeginnerPhase 1.2: Footwork & MovementLower ExplosiveBodyweight
Push Shuffle
AIBeginnerPhase 1.2: Footwork & MovementLower ExplosiveBodyweight
Pivot
AIBeginnerPhase 1.2: Footwork & MovementLower StabilizerBodyweight
Step-Drag (Retreat)
AIBeginnerPhase 1.2: Footwork & MovementLower ExplosiveBodyweight
L-Step
AIIntermediatePhase 1.2: Footwork & MovementLower ExplosiveBodyweight
V-Step
AIIntermediatePhase 1.2: Footwork & MovementLower ExplosiveBodyweight
Diamond Step
AIIntermediatePhase 1.2: Footwork & MovementLower ExplosiveBodyweight
Circle Movement
AIIntermediatePhase 1.2: Footwork & MovementLower StabilizerBodyweight
Straight Lead
AIBeginnerPhase 2.1: Striking & Upper BodyAnterior CoreFocus Mitts
The Jab
AIBeginnerPhase 2.1: Striking & Upper BodyAnterior CoreFocus Mitts
Rear Cross / The Cross / Rear Straight
AIBeginnerPhase 2.1: Striking & Upper BodyRotational CoreFocus Mitts
Vertical Fist
AIBeginnerPhase 2.1: Striking & Upper BodyAnterior CoreFocus Mitts
Body Jab
AIBeginnerPhase 2.1: Striking & Upper BodyAnterior CoreFocus Mitts
Body Cross
AIBeginnerPhase 2.1: Striking & Upper BodyRotational CoreFocus Mitts
Lead Hook
AIIntermediatePhase 2.1: Striking & Upper BodyRotational CoreFocus Mitts
Rear Hook
AIIntermediatePhase 2.1: Striking & Upper BodyRotational CoreFocus Mitts
Uppercut
AIIntermediatePhase 2.1: Striking & Upper BodyRotational CoreFocus Mitts
Shovel Hook
AIIntermediatePhase 2.1: Striking & Upper BodyRotational CoreFocus Mitts
Overhand
AIIntermediatePhase 2.1: Striking & Upper BodyRotational CoreFocus Mitts
Corkscrew Punch
AIIntermediatePhase 2.1: Striking & Upper BodyRotational CoreFocus Mitts
Bolo Punch
AIIntermediatePhase 2.1: Striking & Upper BodyRotational CoreFocus Mitts
Horizontal Elbow
AIIntermediatePhase 2.1: Striking & Upper BodyRotational CoreBodyweight
Uppercut Elbow / Spear Elbow
AIIntermediatePhase 2.1: Striking & Upper BodyRotational CoreBodyweight
Diagonal Elbow
AIIntermediatePhase 2.1: Striking & Upper BodyRotational CoreBodyweight
Chopping Elbow
AIIntermediatePhase 2.1: Striking & Upper BodyRotational CoreBodyweight
Palm Strike / Heel Palm
AIBeginnerPhase 2.1: Striking & Upper BodyAnterior CoreFocus Mitts
Finger Jab / Eye Dart
AIBeginnerPhase 2.1: Striking & Upper BodyAnterior CoreFocus Mitts
Hammer Fist
AIBeginnerPhase 2.1: Striking & Upper BodyRotational CoreFocus Mitts
Knife-Hand Strike / Chop
AIBeginnerPhase 2.1: Striking & Upper BodyRotational CoreFocus Mitts
Ridge Hand
AIBeginnerPhase 2.1: Striking & Upper BodyRotational CoreFocus Mitts
Cupped Hand / Slap
AIBeginnerPhase 2.1: Striking & Upper BodyRotational CoreFocus Mitts
Tiger Claw
AIBeginnerPhase 2.1: Striking & Upper BodyGrip & NeckFocus Mitts
Y-Hand / Web Hand
AIBeginnerPhase 2.1: Striking & Upper BodyGrip & NeckFocus Mitts
Shoulder Bump / Check
AIBeginnerPhase 2.1: Striking & Upper BodyFull Body/IntegratedFocus Mitts
Knuckle Fist
AIBeginnerPhase 2.1: Striking & Upper BodyGrip & NeckFocus Mitts
Thumb Gouge
AIBeginnerPhase 2.1: Striking & Upper BodyGrip & NeckFocus Mitts
Crane Beak
AIBeginnerPhase 2.1: Striking & Upper BodyGrip & NeckFocus Mitts
Phoenix Eye Fist
AIBeginnerPhase 2.1: Striking & Upper BodyGrip & NeckFocus Mitts
Leopard Paw
AIBeginnerPhase 2.1: Striking & Upper BodyGrip & NeckFocus Mitts
Scissor Finger
AIBeginnerPhase 2.1: Striking & Upper BodyGrip & NeckFocus Mitts
Headlock Punch
AIBeginnerPhase 2.1: Striking & Upper BodyGrip & NeckFocus Mitts
Bear Hug Bite
AIBeginnerPhase 2.1: Striking & Upper BodyFull Body/IntegratedFocus Mitts
Backhand Chop
AIBeginnerPhase 2.1: Striking & Upper BodyRotational CoreFocus Mitts
Hammer Fist (Ground)
AIIntermediatePhase 2.1: Striking & Upper BodyAnterior CoreYoga/Exercise Mat
Posting Punch
AIIntermediatePhase 2.1: Striking & Upper BodyGrip & NeckYoga/Exercise Mat
Short Hook (Ground)
AIIntermediatePhase 2.1: Striking & Upper BodyRotational CoreYoga/Exercise Mat
Straight Leg Kick
AIBeginnerPhase 2.2: Kicking & KneesLower ExplosiveFocus Mitts
Groin Kick / Snap Kick
AIBeginnerPhase 2.2: Kicking & KneesAnterior CoreFocus Mitts
Jeet Tek / Stop-Kick / Sole Block
AIBeginnerPhase 2.2: Kicking & KneesLower ExplosiveFocus Mitts
Teep / Push Kick
AIBeginnerPhase 2.2: Kicking & KneesAnterior CoreFocus Mitts
Defensive Teep
AIBeginnerPhase 2.2: Kicking & KneesAnterior CoreFocus Mitts
Side Kick
AIBeginnerPhase 2.2: Kicking & KneesLateral CoreFocus Mitts
Chassé Bas (Low Side Kick)
AIBeginnerPhase 2.2: Kicking & KneesLateral CoreFocus Mitts
Front Snap Kick
AIBeginnerPhase 2.2: Kicking & KneesAnterior CoreFocus Mitts
Scoop Kick / Spade
AIBeginnerPhase 2.2: Kicking & KneesAnterior CoreFocus Mitts
Toe Kick
AIBeginnerPhase 2.2: Kicking & KneesAnterior CoreFocus Mitts
Toe Punt / Point Kick
AIBeginnerPhase 2.2: Kicking & KneesAnterior CoreFocus Mitts
Check / Shin Block / Knee Shield / Cross Check
AIBeginnerPhase 2.2: Kicking & KneesAnterior CoreFocus Mitts
Cage Push Kick
AIBeginnerPhase 2.2: Kicking & KneesAnterior CoreFocus Mitts
Shin Scrape / Rake
AIBeginnerPhase 2.2: Kicking & KneesLower ExplosiveFocus Mitts
Defensive Check
AIBeginnerPhase 2.2: Kicking & KneesLower ExplosiveFocus Mitts
Leg Press / Push
AIBeginnerPhase 2.2: Kicking & KneesAnterior CoreFocus Mitts
Roundhouse Kick
AIIntermediatePhase 2.2: Kicking & KneesLower ExplosiveFocus Mitts
Thai Roundhouse
AIIntermediatePhase 2.2: Kicking & KneesLower ExplosiveFocus Mitts
Switch Kick
AIIntermediatePhase 2.2: Kicking & KneesLower ExplosiveFocus Mitts
Low Kick
AIIntermediatePhase 2.2: Kicking & KneesLower ExplosiveFocus Mitts
Inside Low Kick
AIIntermediatePhase 2.2: Kicking & KneesLower ExplosiveFocus Mitts
Calf Kick
AIIntermediatePhase 2.2: Kicking & KneesLower ExplosiveFocus Mitts
Cut Kick
AIIntermediatePhase 2.2: Kicking & KneesLower ExplosiveFocus Mitts
Chopping Low Kick
AIIntermediatePhase 2.2: Kicking & KneesLower ExplosiveFocus Mitts
Middle Kick (Body)
AIIntermediatePhase 2.2: Kicking & KneesLower ExplosiveFocus Mitts
High Kick (Head)
AIIntermediatePhase 2.2: Kicking & KneesLower ExplosiveFocus Mitts
Straight Knee
AIIntermediatePhase 2.2: Kicking & KneesAnterior CoreFocus Mitts
Spear Knee / Long Knee
AIIntermediatePhase 2.2: Kicking & KneesAnterior CoreFocus Mitts
Diagonal Knee
AIIntermediatePhase 2.2: Kicking & KneesLower ExplosiveFocus Mitts
Side Knee (Clinch)
AIIntermediatePhase 2.2: Kicking & KneesLateral CoreFocus Mitts
Horizontal Knee
AIIntermediatePhase 2.2: Kicking & KneesLower ExplosiveFocus Mitts
Curved Knee / Round Knee
AIIntermediatePhase 2.2: Kicking & KneesLower ExplosiveFocus Mitts
Walking Knees
AIIntermediatePhase 2.2: Kicking & KneesAnterior CoreFocus Mitts
Scissor Knee
AIIntermediatePhase 2.2: Kicking & KneesAnterior CoreFocus Mitts
Upkick / Pedalada
AIIntermediatePhase 2.2: Kicking & KneesAnterior CoreYoga/Exercise Mat
Donkey Kick
AIIntermediatePhase 2.2: Kicking & KneesLower ExplosiveYoga/Exercise Mat
Foot Sweep (Inside/Out)
AIIntermediatePhase 2.2: Kicking & KneesLower StabilizerYoga/Exercise Mat
Coup de Pied Bas
AIIntermediatePhase 2.2: Kicking & KneesLower ExplosiveYoga/Exercise Mat
Butterfly Hook / Guard
AIIntermediatePhase 2.2: Kicking & KneesAnterior CoreYoga/Exercise Mat
Knee on Belly
AIIntermediatePhase 2.2: Kicking & KneesAnterior CoreYoga/Exercise Mat
High Guard / Cover Up / Shell / Double Forearm Block
AIBeginnerPhase 2.3: Defense / Control & SurvivalAnterior CoreBodyweight
Long Guard / Framing / Rising Block
AIBeginnerPhase 2.3: Defense / Control & SurvivalAnterior CoreBodyweight
Parry / Catch / Culling Block / Brush Block
AIBeginnerPhase 2.3: Defense / Control & SurvivalRotational CoreBodyweight
Philly Shell / Shoulder Roll
AIBeginnerPhase 2.3: Defense / Control & SurvivalRotational CoreBodyweight
Dracula Guard / Cover / Elbow Block / Crazy Monkey
AIBeginnerPhase 2.3: Defense / Control & SurvivalAnterior CoreBodyweight
Cross-Arm Guard / Cross Block (X-Block)
AIBeginnerPhase 2.3: Defense / Control & SurvivalAnterior CoreBodyweight
Slip (Inside/Outside)
AIIntermediatePhase 2.3: Defense / Control & SurvivalAnterior CoreBodyweight
Roll / Bob & Weave
AIIntermediatePhase 2.3: Defense / Control & SurvivalLower ExplosiveBodyweight
Lean Back / Pull
AIIntermediatePhase 2.3: Defense / Control & SurvivalAnterior CoreBodyweight
Duck
AIIntermediatePhase 2.3: Defense / Control & SurvivalAnterior CoreBodyweight
The Sprawl
AIIntermediatePhase 2.3: Defense / Control & SurvivalAnterior CoreBodyweight
Frame & Base
AIIntermediatePhase 2.3: Defense / Control & SurvivalAnterior CoreYoga/Exercise Mat
Breakfall (Back)
AIIntermediatePhase 2.3: Defense / Control & SurvivalAnterior CoreYoga/Exercise Mat
Breakfall (Side)
AIIntermediatePhase 2.3: Defense / Control & SurvivalFull Body/IntegratedYoga/Exercise Mat
Forward Roll
AIIntermediatePhase 2.3: Defense / Control & SurvivalAnterior CoreYoga/Exercise Mat
Eye Contact / Verbal
AIIntermediatePhase 2.3: Defense / Control & SurvivalFull Body/IntegratedYoga/Exercise Mat
Hip Escape / Shrimping
AIIntermediatePhase 2.4: Ground MovementAnterior CoreYoga/Exercise Mat
Bridge / Upa
AIIntermediatePhase 2.4: Ground MovementAnterior CoreYoga/Exercise Mat
Technical Stand-up
AIIntermediatePhase 2.4: Ground MovementAnterior CoreYoga/Exercise Mat
Crab Walk
AIIntermediatePhase 2.4: Ground MovementPosterior ChainYoga/Exercise Mat
Log Roll
AIIntermediatePhase 2.4: Ground MovementAnterior CoreYoga/Exercise Mat
Posture & Base
BeginnerPhase 2.4: Ground MovementAnterior Core
Centerline Theory
AIBeginnerPhase 3: Fight IQ & ConceptsFull Body/IntegratedBodyweight
Range / Distance
AIBeginnerPhase 3: Fight IQ & ConceptsFull Body/IntegratedBodyweight
Economy of Motion
AIBeginnerPhase 3: Fight IQ & ConceptsFull Body/IntegratedBodyweight
Telegraphing
AIBeginnerPhase 3: Fight IQ & ConceptsFull Body/IntegratedBodyweight
Kinetic Chain
AIBeginnerPhase 3: Fight IQ & ConceptsFull Body/IntegratedBodyweight
Damage Mitigation
AIIntermediatePhase 3: Fight IQ & ConceptsFull Body/IntegratedBodyweight
Combat Breathing
AIBeginnerPhase 3: Fight IQ & ConceptsFull Body/IntegratedBodyweight
Base & Structure
AIBeginnerPhase 3: Fight IQ & ConceptsFull Body/IntegratedBodyweight
Poker Face / Composure
AIBeginnerPhase 3: Fight IQ & ConceptsFull Body/IntegratedBodyweight
Situational Awareness
AIBeginnerPhase 3: Fight IQ & ConceptsFull Body/IntegratedBodyweight
Active Recovery
AIIntermediatePhase 3: Fight IQ & ConceptsFull Body/IntegratedBodyweight
Startle / Flinch Response
AIIntermediatePhase 3: Fight IQ & ConceptsFull Body/IntegratedBodyweight
Southpaw vs Orthodox (Open Stance)
IntermediatePhase 3: Fight IQ & Concepts
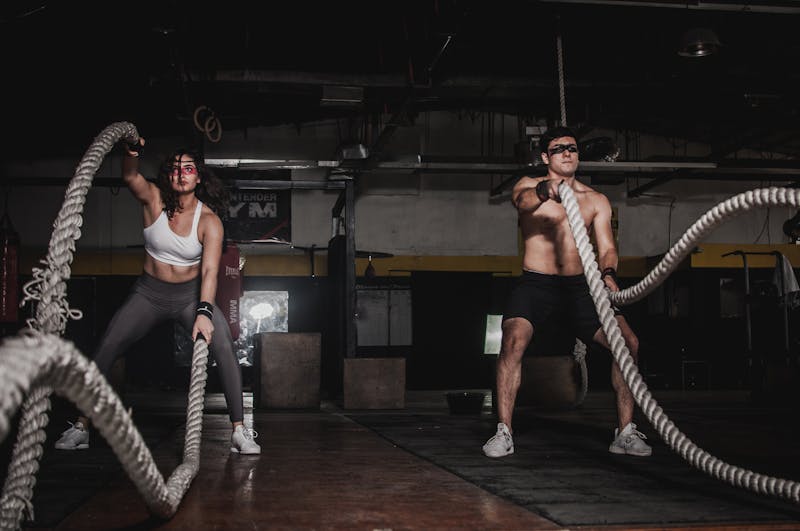
Battle Rope Workout
IntermediatePhase 1.1: Strength & ConditioningFull Body/Integratedbattle-rope
Broad Jump
IntermediatePhase 1.1: Strength & ConditioningFull Body/IntegratedBodyweight
Dumbbell Floor Press
BeginnerPhase 1.1: Strength & ConditioningUpper PushDumbbell
Dumbbell Squats
BeginnerPhase 1.1: Strength & ConditioningLower StabilizerDumbbell
Hammer Curl
BeginnerPhase 1.1: Strength & ConditioningUpper PullDumbbell
Hanging Leg Raise
IntermediatePhase 1.1: Strength & ConditioningAnterior CorePull-Up Bar / Gymnastic Rings
Incline Bicep Curl
BeginnerPhase 1.1: Strength & ConditioningUpper PullDumbbell
Oblique Workout
BeginnerPhase 1.1: Strength & ConditioningLateral CoreBodyweight
Reverse Lunge
BeginnerPhase 1.1: Strength & ConditioningLower StabilizerBodyweight
Side Plank
BeginnerPhase 1.1: Strength & ConditioningLateral CoreBodyweight
Walking Lunge
BeginnerPhase 1.1: Strength & ConditioningLower StabilizerBodyweight

100+ Advanced Movements Locked

You are viewing the Core Basics. Become a premium student to unlock the full 200+ FCS digital encyclopedia.

Book a Session
proper workout form

150+ Guided Drills

150+ guided exercises from the 200+ Functional Combat System (FCS) — MMA conditioning, kickboxing, boxing, functional strength and mobility drills, each with form guides. Completely free, no signup, works on any phone or laptop.

ai fitness coach

AI Vision Form Check

Watches your plank, squat, kick or strike through your camera and corrects your form in real time. Runs 100% on your device — your camera feed is never recorded or uploaded. Free, no signup.

AI Vision Privacy & Security Guarantee LEARN MORE

100% On-Device & Privacy-First

The 200+ FCS Vision Engine operates strictly via Client-Side Edge Computing. Your camera feed is processed entirely inside your local browser in real-time. No video data, images, or camera streams are ever recorded, stored, or uploaded to our servers.

Tensors Only, No Visual Footprints

Our system utilizes Google MediaPipe WebAssembly to instantly convert motion into anonymized 3D landmark coordinate tensors (calculating your 30+ performance dimensions such as Velocity, Centerline Offset, and Kinetic Sequencing). Video frames are permanently discarded from local memory within milliseconds after feature extraction.

Train with elite bio-mechanic feedback with zero friction and absolute privacy.

Reminders & Hydration

Set training and hydration reminders so you never miss a session — and keep Megat Leemow fired up.


Workout Logger & Dashboard

Log sets, track progress and let the AI Vision check your form — your training history syncs across devices.

Please log in to track your 200+ FCS training.


Frequently Asked Questions

What exactly is included in this platform?

Our free exercise library is a meticulously categorized database containing over 150 instructional guides. Rooted in the 200+ Functional Combat System (FCS), it covers everything from MMA conditioning and kickboxing drills to functional mobility and strength training. Whether you are a beginner looking to understand the fundamentals or an advanced athlete aiming to refine your technique, this library serves as your ultimate ai fitness app alternative. You can filter movements by muscle group, equipment availability, or difficulty level, completely free of charge.

How does the AI vision form check improve my training?

Traditional training at home often lacks professional oversight, which can lead to injuries. Our ai vision form check acts as your personal ai fitness coach. Using advanced client-side edge computing, it tracks your joint coordinates directly through your device’s camera. By analyzing your biomechanics in real-time, the system can instantly alert you if your posture is misaligned or your kinetic sequence is incorrect. This ensures you maintain proper workout form during complex exercises like squats, planks, or striking combinations, making your home workouts as safe and effective as a studio session.

Do I need to download any software to use these features?

Absolutely not. Gooart Space is built on modern web technologies. You don’t need to download any bulky applications or register for an account to start training. Simply open our movement index on your preferred browser—whether on a smartphone, tablet, or desktop—and the ai vision form check will run smoothly right within the webpage. We believe frictionless access to elite training tools is the future of fitness.

free exercise library

Access our guided routines to elevate your combat fitness routine.

Open Your Lifetime Training Profile

Session logging, progress tracking and history synced across devices. One-time RM30 — no subscription, no renewals. Pay once, keep it forever.

Open Account — RM30 One-Time
Home Booking Training Nutrition Portal

Fuel & Recovery

FCS ME GAT LEE MOW Z z z 🎆🎇🥤💦💤
😴 Sleeping🙂 Awake💦 Hydrated🔥 Fired Up🏆 PeakLog In to Wake Me Up

Fuel & Recovery

Track hydration, nutrition and training recovery — built for 200+ FCS athletes.

  • Personal water goal calculated from your weight, protein load, creatine & electrolytes
  • One-tap logging: water, supplements, meals & workouts on a daily timeline
  • Weekly insights chart + Coach's Advice tuned to your goals
Pull to Sync
Megat Leemow 😴 Sleeping🙂 Awake💦 Hydrated🔥 Fired Up🏆 Peak
Leemow is napping… log a set or some water to wake the tiger up.Warmed up and ready. One training set or a full water goal levels up today!Hydration goal smashed! Now let's log some training.Training logged — Leemow is fired up! Don't forget your water.Peak day! Training and hydration both done — champion habits.
Log In to Wake Me Up